Is your classic car's AC system blowing hot air? Chances are, it's still running on R12 refrigerant, a substance phased out decades ago due to its ozone-depleting properties. Switching to R134a, the modern alternative, might seem daunting, but with the right knowledge, it can be a manageable upgrade.
Dealing with an outdated AC system can feel like navigating a minefield. Finding qualified technicians familiar with older systems, sourcing dwindling R12 supplies, and the constant worry about leaks can turn your cool summer dreams into a sweaty, frustrating reality. It's enough to make you consider just rolling down the windows and sweating it out.
This guide dives into everything you need to know about converting your vehicle's AC system from R12 to R134a refrigerant. We'll cover the necessary steps, potential challenges, costs involved, and essential considerations to ensure a successful and efficient conversion. So, buckle up, and let's get your AC blowing cold again!
In summary, converting your AC system from R12 to R134a involves retrofitting components, addressing compatibility issues, and understanding the specific requirements for your vehicle. Key considerations include flushing the system, replacing the receiver drier, and using the correct type of oil. By understanding these factors, you can ensure a successful and environmentally responsible upgrade. This switch is necessary due to the environmental impact of R12 and the improved availability and lower environmental impact of R134a. This conversion covers everything from the types of refrigerants, retrofit kits, ester oil, PAG oil, vacuum pump, and the new o-rings needed for a full conversion.
Understanding the Refrigerant Difference
Understanding the differences between R12 and R134a is crucial before diving into the conversion process. R12, also known as Freon-12, was widely used in automotive AC systems until its production was phased out under the Montreal Protocol due to its detrimental effects on the ozone layer. R134a, a hydrofluorocarbon (HFC), was introduced as a more environmentally friendly alternative. It doesn't deplete the ozone layer, although it does have a global warming potential (GWP), which is why even newer refrigerants are being explored.
I remember when I first started working on cars, R12 was still somewhat available, but expensive. An older gentleman came into the shop with a beautiful '70s Cadillac. He was adamant about keeping the R12 system running, believing it cooled better. We managed to recharge it, but it was a temporary fix, and the leaks were persistent. It was then I realized the long-term impracticality of sticking with R12.
R12 operates at different pressures than R134a, which means that simply swapping refrigerants won't work. R134a requires a higher pressure to achieve the same cooling effect. This pressure difference necessitates component upgrades to handle the increased stress. Furthermore, the oils used with each refrigerant are incompatible. R12 systems use mineral oil, while R134a systems typically use ester or PAG oil. Mixing these oils can lead to system failure due to clogging and reduced lubrication. Properly flushing the system to remove all traces of the old oil is essential for a successful conversion.
Essential Components for the Conversion
A successful R12 to R134a conversion requires more than just swapping out the refrigerant. Several key components need to be addressed to ensure compatibility and optimal performance. The most critical component is the receiver drier (or accumulator, depending on the system). This part filters moisture and contaminants from the refrigerant and should always be replaced during a conversion. The old receiver drier is likely saturated with mineral oil and contaminants, which would compromise the new R134a system.
Additionally, you'll need to replace the O-rings throughout the AC system. R12 O-rings are not compatible with R134a and can leak, leading to refrigerant loss. Using O-rings specifically designed for R134a is crucial for creating a tight seal. Many retrofit kits include these O-rings, making the process more convenient. Furthermore, consider replacing the expansion valve or orifice tube. These components regulate the flow of refrigerant into the evaporator and can become clogged or worn over time. Replacing them ensures proper cooling performance. A high-pressure switch might also need to be replaced or adjusted to accommodate the higher operating pressures of R134a. This switch protects the compressor from damage by shutting it down if the pressure gets too high.
Myths and Realities of R134a Conversion
Over the years, many myths have sprung up surrounding the R12 to R134a conversion. One common myth is that R134a doesn't cool as well as R12. While it's true that R134a has a slightly lower cooling capacity, a properly executed conversion, with the right components and charge level, can provide adequate cooling performance. The key is to ensure the system is optimized for R134a.
Another myth is that you can simply "top off" an R12 system with R134a. This is a recipe for disaster. As mentioned earlier, the oils are incompatible, and mixing them can cause serious damage to the compressor and other components. It's also illegal to knowingly vent R12 into the atmosphere. Some believe that R134a conversions are always expensive and complicated. While it's true that it requires some investment and effort, it's often more cost-effective in the long run than trying to maintain an R12 system with dwindling refrigerant supplies and specialized parts. Retrofit kits are readily available, and many shops offer conversion services at reasonable prices. The reality is that a well-planned and executed R134a conversion can provide reliable cooling performance and peace of mind, knowing you're using a more environmentally friendly refrigerant.
Hidden Challenges and Potential Pitfalls
While an R12 to R134a conversion might seem straightforward, several hidden challenges can arise if you're not careful. One common issue is insufficient flushing of the system. As mentioned earlier, it's critical to remove all traces of the old mineral oil. However, some systems have intricate designs that make it difficult to flush thoroughly. Residual oil can contaminate the new R134a system and lead to compressor failure.
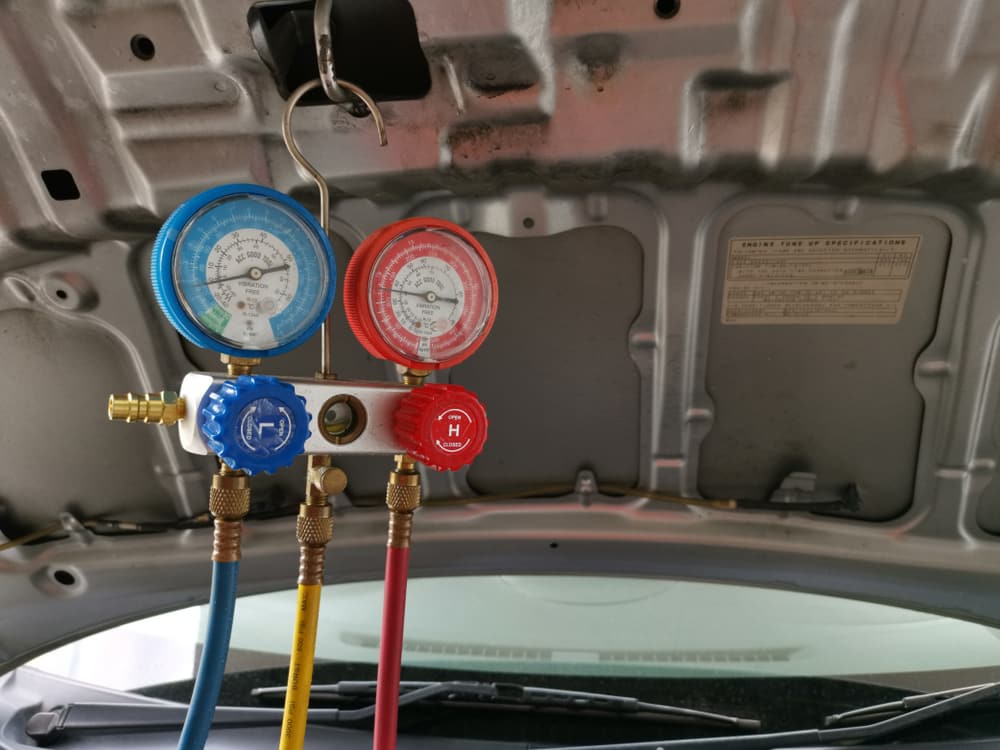
Another potential pitfall is overcharging the system with R134a. Because R134a operates at higher pressures, it's easy to overfill the system, which can damage the compressor and other components. Always follow the manufacturer's recommendations for the correct charge level. Using a manifold gauge set to monitor the pressures is essential for avoiding overcharging. Furthermore, compatibility issues can arise with certain older components. Some hoses and seals might not be compatible with R134a and can leak over time. It's essential to inspect these components carefully and replace them if necessary. Finally, be aware that some vehicles might require additional modifications beyond the standard conversion kit. For example, some systems might need a larger condenser to improve cooling performance with R134a. Addressing these hidden challenges can ensure a successful and long-lasting conversion.
Professional vs. DIY Conversion: Which is Right for You?
Deciding whether to tackle an R12 to R134a conversion yourself or hire a professional depends on your mechanical skills, available tools, and comfort level. A DIY conversion can save you money on labor costs, but it also requires a significant investment in tools and knowledge. You'll need a manifold gauge set, a vacuum pump, refrigerant, O-rings, a receiver drier, and potentially other components.
More importantly, you'll need to understand how to use these tools correctly and how to properly diagnose and troubleshoot any issues that might arise. If you're not comfortable working on AC systems or lack the necessary tools, it's best to hire a professional. A qualified technician has the expertise and equipment to perform the conversion safely and efficiently. They can also identify any potential problems and make the necessary adjustments to ensure optimal cooling performance. Furthermore, they can properly dispose of the old R12 refrigerant, which is essential for environmental compliance. Ultimately, the decision depends on your individual circumstances. If you're a seasoned DIYer with the right tools and knowledge, a conversion kit can be a great way to save money. However, if you're unsure about any aspect of the process, it's always best to err on the side of caution and hire a professional.
Understanding Ester Oil and PAG Oil
The type of oil used in your AC system is critical for proper lubrication and system longevity. When converting from R12 to R134a, it's crucial to use the correct type of oil compatible with the new refrigerant. Two primary types of oil are commonly used in R134a systems: ester oil and PAG oil. Ester oil is a synthetic oil that's compatible with both R12 and R134a systems. This makes it a popular choice for retrofit conversions, as it can tolerate small amounts of residual mineral oil from the old R12 system.
PAG oil, on the other hand, is a petroleum-based oil specifically designed for R134a systems. It provides excellent lubrication and is often preferred for newer R134a systems. However, it's not compatible with mineral oil and can cause problems if mixed. The choice between ester oil and PAG oil depends on the specific requirements of your vehicle and the thoroughness of the system flush. If you're unsure which type of oil to use, consult a professional technician or refer to your vehicle's service manual. Using the wrong type of oil can lead to compressor failure and other costly repairs. Remember, proper lubrication is essential for keeping your AC system running smoothly and efficiently.
DIY Tips for a Smooth Conversion
If you decide to tackle the R12 to R134a conversion yourself, here are some tips to help ensure a smooth and successful process. First, gather all the necessary tools and components before you start. This includes a manifold gauge set, a vacuum pump, refrigerant, O-rings, a receiver drier, and the appropriate type of oil.
Next, thoroughly flush the system to remove all traces of the old mineral oil. Use a dedicated AC flush solvent and follow the manufacturer's instructions carefully. Replace all O-rings with R134a-compatible ones. Pay close attention to the type and size of the O-rings to ensure a proper seal. Replace the receiver drier (or accumulator) and expansion valve or orifice tube. These components are essential for proper cooling performance. Connect the manifold gauge set and vacuum pump and evacuate the system for at least 30-45 minutes. This removes moisture and air from the system. Finally, charge the system with the correct amount of R134a refrigerant. Refer to your vehicle's service manual or a conversion chart for the appropriate charge level. Monitor the pressures on the manifold gauge set to ensure you're not overcharging or undercharging the system. By following these tips, you can increase your chances of a successful DIY conversion.
Safety First: Handling Refrigerants Responsibly
Working with refrigerants can be dangerous if you don't take the necessary precautions. Refrigerants are under high pressure and can cause frostbite or other injuries if handled improperly. Always wear safety glasses and gloves when working with refrigerants. Avoid breathing refrigerant vapors, as they can be harmful. Work in a well-ventilated area to prevent the buildup of refrigerant fumes.
Never release refrigerant into the atmosphere. It's illegal and harmful to the environment. Use a refrigerant recovery machine to properly evacuate the system and dispose of the old refrigerant according to local regulations. Store refrigerant cylinders in a cool, dry place away from heat and direct sunlight. Keep them out of reach of children. When connecting and disconnecting hoses, make sure the system is depressurized to avoid refrigerant leaks. Double-check all connections to ensure they're tight before charging the system. If you're not comfortable handling refrigerants safely, it's best to leave the conversion to a qualified technician. Safety should always be your top priority.
Fun Facts About AC Systems and Refrigerants
Did you know that the first automotive AC system was introduced in 1939 by Packard? These early systems were bulky and expensive, but they paved the way for the widespread adoption of AC in vehicles. R12, the refrigerant used in these early systems, was hailed as a miracle chemical for its excellent cooling properties.
However, its ozone-depleting effects eventually led to its phase-out. R134a, the replacement for R12, is now facing its own environmental scrutiny due to its global warming potential. Scientists are constantly searching for new, more environmentally friendly refrigerants with lower GWP. The Montreal Protocol, an international treaty signed in 1987, played a crucial role in phasing out ozone-depleting substances like R12. The protocol is considered one of the most successful environmental agreements in history. AC systems not only cool the air but also dehumidify it, making the cabin more comfortable. The receiver drier (or accumulator) in your AC system contains a desiccant that absorbs moisture from the refrigerant. Without it, moisture could freeze and clog the system. The next time you crank up the AC on a hot day, remember the fascinating history and science behind this essential automotive technology.
Step-by-Step Guide to Converting Your AC System
Here's a detailed step-by-step guide to converting your AC system from R12 to R134a:
1.Recover the R12 Refrigerant: This must be done legally, using a recovery machine, by a certified technician. Never vent R12 into the atmosphere.
2.Flush the System: Disconnect all components (compressor, condenser, evaporator, hoses) and flush them thoroughly with a compatible AC flush solvent. Pay close attention to the evaporator, as it can be difficult to flush completely.
3.Replace Components: Replace the receiver drier (or accumulator), expansion valve or orifice tube, and all O-rings with R134a-compatible ones.
4.Install Adapter Fittings (if needed): Some conversion kits include adapter fittings that allow you to connect R134a hoses to the existing R12 fittings.
5.Add the Correct Oil: Add the appropriate type and amount of oil (ester or PAG) to the compressor. Refer to your vehicle's service manual or a conversion chart for the correct amount.
6.Evacuate the System: Connect a vacuum pump to the system and evacuate it for at least 30-45 minutes to remove moisture and air.
7.Charge the System: Charge the system with the correct amount of R134a refrigerant. Refer to your vehicle's service manual or a conversion chart for the appropriate charge level. Monitor the pressures on the manifold gauge set to ensure you're not overcharging or undercharging the system.
8.Test the System: Start the engine and turn on the AC. Check the vent temperature to ensure it's cooling properly. Monitor the pressures on the manifold gauge set to ensure they're within the normal range.
What If the Conversion Fails? Troubleshooting Common Issues
Even with careful planning and execution, an R12 to R134a conversion can sometimes fail. Here are some common issues and how to troubleshoot them: Insufficient Cooling: This can be caused by several factors, including undercharging the system, a clogged expansion valve or orifice tube, a faulty compressor, or a leaking condenser. High Pressures: This can be caused by overcharging the system, a restricted airflow across the condenser, or a faulty high-pressure switch. Leaks: This can be caused by faulty O-rings, damaged hoses, or a leaking component. Use a refrigerant leak detector to pinpoint the source of the leak. Compressor Noise: This can be caused by low refrigerant levels, contaminated oil, or a worn compressor. System Clogging:This can be caused by incompatible oils or debris in the system. Flushing the system again and replacing the receiver drier may be necessary.
If you encounter any of these issues, it's essential to diagnose the problem correctly before attempting any repairs. Consulting a qualified technician can be helpful if you're unsure how to proceed.
Top 5 Reasons to Convert to R134a
Here are the top 5 reasons why you should consider converting your AC system from R12 to R134a:
1.Environmental Responsibility: R12 is an ozone-depleting substance that's harmful to the environment. Converting to R134a is a more environmentally friendly option.
2.Refrigerant Availability: R12 is becoming increasingly scarce and expensive. R134a is readily available and more affordable.
3.Component Compatibility: Many AC components designed for R134a are readily available and can improve the performance of your system.
4.Legal Compliance: It's illegal to knowingly vent R12 into the atmosphere. Converting to R134a ensures you're in compliance with environmental regulations.
5.Improved Performance: A properly executed R134a conversion can provide adequate cooling performance and improve the reliability of your AC system.
Converting to R134a is a practical and responsible choice for maintaining the cooling comfort of your vehicle while minimizing its environmental impact.
Question and Answer Section
Here are some frequently asked questions about converting from R12 to R134a:
Q: How much does it cost to convert from R12 to R134a?
A: The cost can vary widely depending on whether you do it yourself or hire a professional, the parts needed, and the complexity of your vehicle's AC system. DIY kits can range from $50 to $200, while professional conversions can cost between $300 and $1000 or more.
Q: Can I just add R134a to my R12 system?
A: No, this is not recommended and can damage your AC system. The oils used in R12 and R134a systems are incompatible, and mixing them can lead to compressor failure and other problems. You need to properly flush the system and replace the necessary components.
Q: Will R134a cool as well as R12?
A: R134a has a slightly lower cooling capacity than R12. However, a properly executed conversion, with the right components and charge level, can provide adequate cooling performance. You may notice a slight difference, but it shouldn't be significant.
Q: Is it legal to convert from R12 to R134a?
A: Yes, it is legal to convert from R12 to R134a as long as you follow proper procedures, including recovering the R12 refrigerant and disposing of it properly. It is illegal to knowingly vent R12 into the atmosphere.
Conclusion of Switching from R12 to R134a: What You Need to Know
Switching your AC system from R12 to R134a is a worthwhile endeavor, offering environmental benefits, refrigerant availability, and improved component compatibility. Whether you choose the DIY route or seek professional assistance, understanding the essential steps, potential challenges, and necessary components is crucial for a successful conversion. By taking the time to educate yourself and follow best practices, you can ensure a cool and comfortable ride while contributing to a healthier planet. Remember to prioritize safety, handle refrigerants responsibly, and consult with professionals when needed. With the right knowledge and approach, you can confidently navigate the R12 to R134a conversion process and enjoy the benefits of a modern, environmentally conscious AC system.